Shanghai Gokai Industry Co,.Ltd.
Call Us: +86-18918606548
Call Us: +86-18918606548
- Product Name
- Product Keyword
- Product Model
- Product Summary
- Product Description
- Multi Field Search
Views: 283 Author: Gokai Publish Time: 2026-07-24 Origin: Site


Content Menu
● Why Acrylic Photo Frames Are Worth the Effort
● The Two‑Panel Floating Acrylic Frame Concept
● Selecting the Right Acrylic Sheet
● Tools and Materials Checklist
● Step 1: Plan the Frame Size and Image Layout
● Step 2: Prepare and Align the Acrylic Panels
● Step 3: Mark and Drill the Mounting Holes
● Step 4: Clean the Panels and Remove Dust
● Step 5: Position and Secure the Photo
● Step 6: Assemble the Frame Hardware
● Step 7: Install the Acrylic Frame on the Wall
● Professional Tips for Better Acrylic Frames
● Maintenance and Long‑Term Care
● When to Scale Up with OEM Acrylic Sheet Solutions
● FAQ
Creating a photo frame with clear acrylic sheet is a simple way to turn a favorite image into a modern centerpiece for your home, office, gallery, or retail display. From practical workshop tips to material choices, a well‑planned acrylic frame combines clarity, safety, and durability with a clean, contemporary look.
Drawing on both hands‑on fabrication and long‑term collaboration with acrylic sheet projects, this guide walks through every stage of the process, from selecting material and tools to drilling, assembly, and wall installation. The steps are designed for individual creators, small studios, and teams that plan to repeat the process for multiple frames or larger rollouts.
Acrylic has become a preferred alternative to traditional glass for many framing projects. It is lighter, less fragile, and highly adaptable to different frame sizes and purposes.
Key advantages of acrylic sheets for photo frames include:
- High optical clarity that keeps images sharp and bright
- Significantly lower weight compared with glass of similar size
- Excellent impact resistance and reduced risk of shattering
- Available options with enhanced UV resistance for image protection
- Easy cutting, drilling, polishing, and forming for customized designs
These features make acrylic a strong choice not only for DIY projects, but also for professional displays in museums, retail stores, hospitality spaces, and corporate interiors.

A popular style of acrylic frame is the two‑panel "floating" design. Instead of a bulky frame around the edges, the image is sandwiched between two clear acrylic panels, which are then fastened together at the corners or sides.
This structure creates a floating effect:
- Two panels of identical size are aligned
- The photo or print is centered between them
- Hardware such as standoffs, screws, or clamps holds the panels together
- The frame either hangs on the wall or stands on a base or easel
Because the edges are minimal and the image is visible through the clear acrylic, the frame feels light and modern. The same structure can be used for single photos, large posters, layered artwork, or branded visual graphics.
Thoughtful selection of acrylic sheet is one of the most important decisions in the entire project. Thickness, size, and surface finish all affect the appearance and performance of the finished frame.
For most photo frames, common thickness ranges are:
- Around 2–3 mm for small desk frames or compact wall pieces
- Around 4–5 mm for typical wall‑mounted frames in living and working spaces
- Around 6 mm or more for large, statement pieces or installations in open areas
Thicker material offers greater rigidity and a more substantial feel, especially for larger panels. Thinner material remains lighter but can flex more if the frame is very large. Matching thickness to frame size and mounting method helps keep the structure stable over time.
Acrylic sheets are available with different surface finishes and colors:
- Clear glossy acrylic provides high transparency and a glass‑like shine
- Non‑glare or matte acrylic reduces reflections in bright rooms
- Tinted, frosted, or colored acrylic can add a decorative border or background
For most first projects and for versatile use across environments, clear acrylic with good light transmission and UV‑resistant properties is a reliable baseline choice.
Preparing all materials in advance keeps the build process smooth and efficient. Below is a practical checklist based on common workshop setups and real projects.
Core materials:
- Two cut‑to‑size acrylic panels per frame
- Photo, art print, poster, or certificate
- Optional backing paper to create margins or contrast
- Clear glue dots or low‑tack mounting tape to hold the image in position
Hardware and mounting options:
- Standoff mounts or decorative screws for wall installation
- Anchors and wall plugs suitable for the wall material
- For tabletop displays: a metal stand, acrylic base, or easel support
Tools and safety equipment:
- Measuring tape or metal ruler
- Painter's tape or masking tape
- Pencil or marker for markings on tape
- Drill with bits suitable for plastics, or drill press
- Clamps to hold panels together during drilling
- Microfiber cloths and mild soap solution for cleaning
- Safety glasses and protective gloves
Many users choose to order acrylic panels that are pre‑cut to size, with protective film intact on both sides, to save time and avoid complex cutting at home.
Before any drilling or assembly, it helps to decide how the image will sit inside the acrylic sandwich. This planning stage shapes the overall look of the finished frame.
Consider the following:
- Whether you want a borderless appearance, where the acrylic is only slightly larger than the photo
- Whether you prefer a floating effect, where the acrylic extends beyond the photo on all sides
- Whether multiple frames will be used together on a wall, requiring consistent margins and spacing
A common approach for a floating effect is to make the acrylic panels a few centimeters or a couple of inches larger than the print on each side. This creates breathing room around the image and a clean, intentional look.
Most factory‑cut acrylic panels are delivered with protective film on both sides. Keeping this film in place during marking and drilling protects the surface from scratches and gives a clear area to mark.
A typical preparation sequence includes:
- Leaving the protective film on while measuring and marking
- Applying painter's tape over the areas where holes will be drilled
- Marking hole positions on the tape with a pencil or marker
- Aligning the two panels precisely and clamping them together
Clamping is especially important because it keeps the holes perfectly aligned from front panel to back panel. This is crucial for standoff mounts and other through‑panel hardware.
Accurate hole placement is essential for a frame that hangs level and remains stable. Positioning the holes too close to the edge can weaken the acrylic; placing them too far in can change the visual balance.
A straightforward layout uses one hole near each corner at the same distance from both edges. On large frames, additional holes along the sides may be needed to support the weight evenly.
When drilling acrylic:
- Use a drill bit designed for plastics or a bit with a gentle point
- Drill at moderate speed with light pressure
- Support the acrylic fully on a flat surface
- Let the drill bit work gradually, avoiding sudden force
Some makers gently melt a small indentation with a heated nail or metal rod before drilling, giving the bit a stable starting point on the smooth surface. This hybrid melt‑and‑drill approach can reduce wandering and chipping.
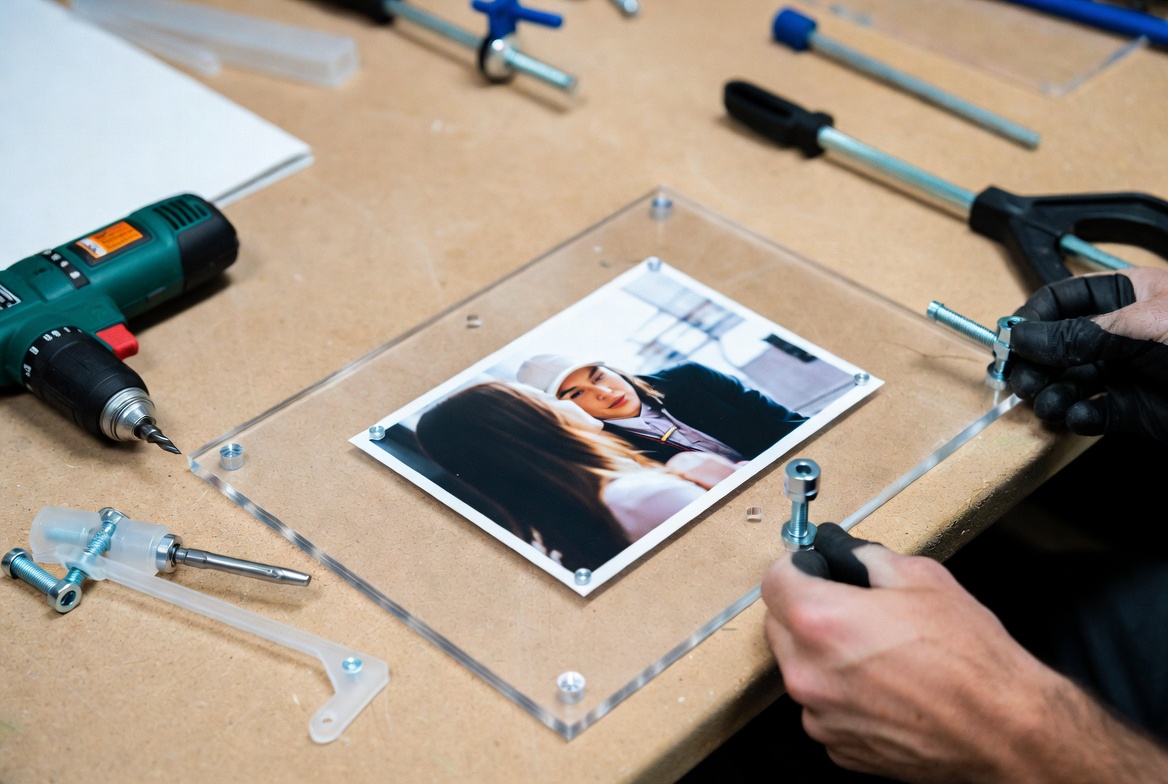
Once drilling is complete and hole alignment has been checked, it is time to remove chips and dust. Clean panels are crucial to avoid trapping debris between the acrylic and the image.
A careful cleaning process might include:
- Brushing away loose chips with a soft brush or compressed air
- Removing the protective film from the inner faces that will contact the photo
- Washing gently with mild soap and water, then drying with a microfiber cloth
- Avoiding harsh cleaners or ammonia‑based solutions that can damage the surface
At this stage, it is important to work in a relatively dust‑free area and to handle panels with clean, dry hands.
With clean inner surfaces and drilled holes ready, the image can now be placed and fixed in position inside the acrylic sandwich.
A practical method is:
- Lay the first acrylic panel flat with the inner side facing up
- Center the photo or print, checking that all margins are even
- Use small clear glue dots or low‑tack tape behind the image to hold it in place
- Keep adhesive away from the visible edges to avoid distraction
If a colored backing or contrasting sheet is used, it can be placed behind the photo at this stage. Once everything is aligned, the second panel is carefully lowered into place, matching the drilled holes and avoiding any sliding movement that could scratch the acrylic.
With the photo and panels aligned, hardware can be installed to form the final frame structure. Standoffs, screws, or clamps keep the panels pressed together and provide mounting points.
Typical steps include:
- Inserting screws or standoff bolts through the aligned holes
- Lightly tightening by hand to hold the panels together
- Checking edge alignment and image position before full tightening
- Using a screwdriver or tool only enough to secure the hardware, not to the point of stressing or cracking the acrylic
For standoff mounts, the barrels are usually fixed to the wall, with the panels held between the barrel and the front cap. Hole diameters must match the hardware to ensure a snug, stable fit.
For tabletop use, instead of standoffs, the panels may be attached to a base, bracket, or L‑shaped support.
The last step is wall installation for frames designed to hang. Good planning at this stage helps the frame stay level, safe, and visually coherent with other decor or display items.
A straightforward approach involves:
- Holding the assembled frame where it will hang and marking the hole positions on the wall
- Using a level and measuring tools to verify that marks are square and evenly spaced
- Pre‑drilling the wall and inserting appropriate anchors
- Attaching the standoff barrels or mounting hardware securely
- Aligning the frame and fastening the front caps or screws
For larger frames, working with two people improves safety and precision, especially when mounting at height or handling longer panels.
Experience from repeated projects often reveals small refinements that significantly improve results. The following practical tips come from frequent collaboration with acrylic manufacturing and fabrication.
Allow for temperature changes
Acrylic expands and contracts with temperature fluctuations. Leaving a small clearance around mounting hardware helps accommodate this movement and reduces the risk of stress cracking, especially in environments with large temperature swings.
Use UV‑resistant material for sunlit areas
Where frames will be exposed to sunlight or strong artificial light, UV‑resistant acrylic protects both the sheet and the image from discoloration and fading. This is particularly important for fine art prints, certificates, and irreplaceable photos.
Consider edge finishing options
Polished edges give acrylic frames a refined, premium appearance. Depending on the project scale, this can be achieved by careful sanding and polishing for small runs or by professional edge‑finishing techniques for larger volumes.
Standardize sizes across multiple frames
For galleries, hotels, retail chains, or corporate offices, using a set of standardized panel sizes and thicknesses simplifies reordering and long‑term maintenance. Consistent sizing also creates a cohesive visual language across all displays.
Acrylic frames are durable, but they benefit from simple, consistent care routines to maintain their clarity and appearance.
Cleaning practices:
- Use soft microfiber cloths instead of rough fabrics or paper towels
- Wipe with mild soap and water, then dry gently
- Avoid abrasive cleaners or solvent‑based sprays
Scratch prevention:
- Keep sharp objects away from the surface during installation and cleaning
- Store frames with soft separators between them
- For minor surface marks, use specialized acrylic polishes designed to reduce fine scratches
With correct handling and cleaning, acrylic photo frames can retain their clarity and structure for many years in both residential and commercial settings.
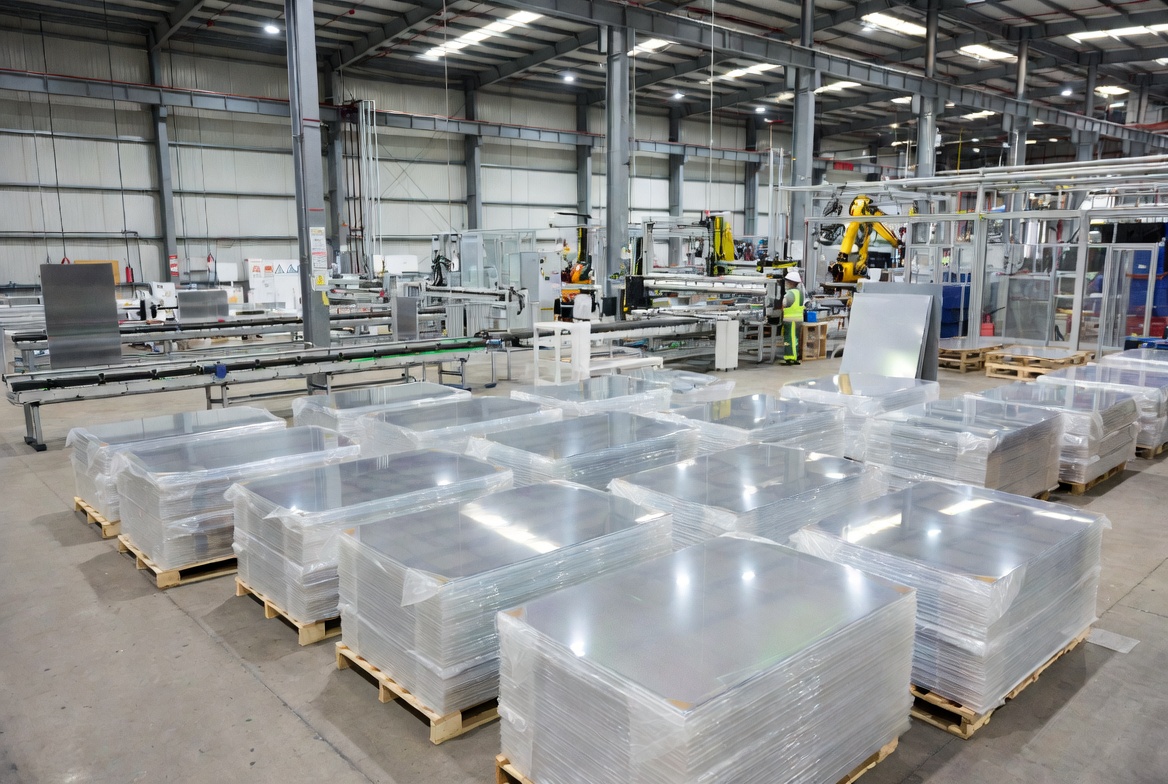
For one‑off DIY frames, local cutting and workshop assembly can be sufficient. However, when projects expand to multiple locations or larger numbers of frames, working directly with an experienced acrylic sheet manufacturer offers significant advantages.
A dedicated supplier can:
- Provide consistent, cut‑to‑size panels tailored to common frame dimensions
- Recommend suitable grades and thicknesses for different environments
- Offer UV‑resistant options for demanding lighting conditions
- Coordinate batch production with drilling, edge finishing, or printing services
- Pack and ship panels efficiently for national or international distribution
This type of collaboration supports designers, brand owners, exporters, and project managers who need repeatable quality and reliable supply for ongoing framing programs.
Designing and building a photo frame with cut‑to‑size acrylic sheet combines creative control with practical craftsmanship. By choosing appropriate material, following careful drilling and assembly steps, and applying professional finishing and maintenance practices, it is possible to achieve frames that look refined, remain durable under everyday use, and adapt easily to different spaces.
Whether the goal is a single special frame for a family photo or a coordinated series of frames for a showroom, the same principles apply: precise preparation, attention to detail, and thoughtful matching of materials to their real‑world environment.
Q1: What thickness of acrylic works best for everyday wall frames?
For most household or office wall frames, sheets around 4 mm thick offer a solid balance between rigidity and weight. Smaller frames can use slightly thinner material, while very large frames benefit from thicker panels.
Q2: Is it possible to cut acrylic at home without professional equipment?
Yes, but achieving smooth, accurate cuts is more challenging with basic tools. Many people find it easier to order pre‑cut panels from a supplier or to have them cut using tools specifically designed for plastic sheets.
Q3: Will acrylic frames become yellow over time?
High‑quality acrylic formulated with UV stabilization is designed to resist yellowing under normal conditions. Choosing such material is especially important for frames placed in bright or sunlit areas.
Q4: How can scratches be minimized during assembly?
Keeping the protective film on as long as possible, working on a clean surface, and using only microfiber cloths during cleaning helps reduce the risk of scratches. Gentle handling and avoiding sliding motions between panels also make a difference.
Q5: Are acrylic frames suitable for professional galleries and exhibitions?
Yes. Many galleries and exhibition spaces use acrylic for large or valuable works due to its lower weight, increased impact resistance, and available options with non‑glare and UV‑filtering properties.
1. Acme Plastics – How to Make a Photo Frame with Cut‑To‑Size Acrylic https://www.acmeplastics.com/content/how-to-make-a-photo-frame-with-cut-to-size-acrylic/
2. Homedit – DIY Faux Acrylic Photo Frames https://www.homedit.com/acrylic-photo-frames/
3. ACRYLITE – DIY Floating Picture Frame Tutorial https://www.acrylite.co/applications/framing-and-picture-glazing/diy-floating-picture-frame-tutorial-by-acrylite
4. Instructables – DIY Picture Frame (Acrylic Floating Frame) https://www.instructables.com/DIY-Picture-Frame-1/
5. J'adore le Décor – The Best, Most Affordable DIY Acrylic Picture Frames Ever https://www.jadoreledecor.com/blog/the-best-acrylic-picture-frames-youll-ever-make
6. Gokai – How to Make a Professional Acrylic Photo Frame https://www.gokai.com.cn/amp/how-to-make-a-professional-acrylic-photo-frame.html
7. Gokai – Acrylic Sheet and UV Acrylic Sheet Product Information https://www.gokai.com.cn/acrylic-sheet.html | https://www.gokaiplastic.com/uv-acrylic-sheet/