Shanghai Gokai Industry Co,.Ltd.
Call Us: +86-18918606548
Call Us: +86-18918606548
- Product Name
- Product Keyword
- Product Model
- Product Summary
- Product Description
- Multi Field Search
Views: 259 Author: Gokai Publish Time: 2026-07-19 Origin: Site


Content Menu
● Understanding Plexiglass (Acrylic) as a Window Material
● Why Insulating Plexiglass Windows Helps Reduce Energy Costs
● Acrylic vs. Glass: Thermal, Optical, and Safety Considerations
● How Insulated Plexiglass Windows Work
● Step-by-Step Method: Insulating a Plexiglass Window
>> Step 1: Inspect the Existing Window
>> Step 2: Choose the Right Acrylic Thickness
>> Step 3: Prepare and Clean the Frame
>> Step 4: Apply Foam Weatherstripping
>> Step 5: Install or Secure the Sub-Frame (If Used)
>> Step 6: Dry-Fit the Acrylic Panel
>> Step 7: Seal the Perimeter with Compatible Sealant
>> Step 8: Clean and Protect the Acrylic Surface
● Alternative DIY Approaches for Acrylic Window Insulation
● Common Mistakes When Insulating Plexiglass Windows
● Expert Insights from an Acrylic Sheet Manufacturer
● Where Plexiglass Insulation Offers the Most Value
● Recommended Materials and Tools
>> 1. Is plexiglass better than glass for window insulation?
>> 2. What thickness of acrylic is recommended for windows?
>> 3. Can insulated plexiglass windows stop condensation?
>> 4. Are acrylic panels suitable for renters?
>> 5. How much can plexiglass insulation reduce energy bills?
Plexiglass is a commonly used name for clear acrylic sheet, a transparent thermoplastic known for its clarity, impact resistance, and ease of fabrication. Acrylic has been used for glazing since the early twentieth century in demanding applications such as aircraft windows, skylights, and safety barriers. Because it combines high visible light transmission with lower weight and better impact resistance than ordinary glass, acrylic has become a popular choice for secondary glazing and interior storm window systems.
When used as part of a window assembly, acrylic offers several advantages that directly affect comfort and energy performance. It transmits a high percentage of visible light, providing bright interiors without the heavy, brittle nature of traditional glass. At the same time, its thermal characteristics differ from glass, which allows it to contribute to better insulation when used correctly. For homeowners and building managers, this means acrylic window inserts can improve comfort and reduce energy waste without a full window replacement.
In many homes, windows are a major source of heat loss in winter and heat gain in summer. Even when glass panes themselves are intact, small air leaks around the frame and sash can create cold drafts and unstable room temperatures. Adding insulated plexiglass panels tackles the problem in two ways: it increases the resistance to heat flow through the window and reduces uncontrolled air movement around it. As a result, interior surfaces stay warmer in cold weather and cooler in hot weather, which helps heating and cooling systems operate more efficiently.
Acrylic sheets can also be used to form a controlled air gap, similar to the cavity in double-glazed units. This trapped layer of air slows down heat transfer by conduction and convection. When combined with weatherstripping and suitable sealants, the plexiglass layer acts as an additional barrier against energy loss. Over time, these improvements can translate into noticeable reductions in heating and cooling costs, especially in buildings with older single-pane windows or poorly sealed frames.
At first glance, acrylic and glass may appear similar because both materials are transparent and serve as glazing. However, their physical properties differ in ways that matter for window insulation. Acrylic generally has lower thermal conductivity than conventional window glass, which means that for the same thickness, it slows down heat transfer more effectively. In real-world secondary glazing systems, acrylic inserts can significantly improve overall thermal performance compared with a single glass pane.
Optically, high-quality acrylic can provide excellent clarity and light transmission. Many clear acrylic sheets transmit over ninety percent of visible light, creating bright indoor spaces while maintaining a lightweight structure. Acrylic is also more impact-resistant than ordinary glass, which makes it suitable for areas exposed to higher loads, such as upper-story windows, storm-prone locations, and high-traffic spaces. These characteristics make acrylic an attractive choice for insulated window upgrades that prioritize both safety and comfort.
Insulated plexiglass window systems rely on a combination of air sealing, controlled air gaps, and material selection. The basic concept is to add a secondary acrylic panel on the interior side of an existing window or design the primary window itself with acrylic glazing and suitable insulation details. The space between the existing pane and the acrylic layer acts as an insulating cavity, while weatherstripping and sealants minimize air leakage.
From a building physics perspective, the key mechanisms are reduced conduction, reduced convection, and limited infiltration. Conduction is controlled by choosing materials and thicknesses that resist heat flow. Convection is reduced by creating a stable, sealed air gap that does not allow strong internal air circulation. Infiltration is minimized by closing off gaps and cracks around the frame, sash, and joints. When all three aspects are addressed, plexiglass windows can significantly improve interior comfort and reduce the workload on heating and cooling systems.

For homeowners and installers, a clear and repeatable process is essential to achieve consistent results. The following method outlines a practical approach that balances ease of installation with reliable performance.
Start by examining the current window. Identify where drafts are entering, such as gaps between sash and frame or cracks around the perimeter. Check the condition of the frame materials and existing sealants. If there is significant rot, structural damage, or severe distortion, consider repairing or stabilizing the frame before adding a plexiglass panel. A solid, stable base ensures that the insulation measures will last and perform as intended.
Take measurements carefully, recording the visible glass area and the overall frame opening. Decide whether the acrylic panel will act as a removable interior insert or a more permanent interior storm panel fixed to a sub-frame. This decision will influence how you cut the acrylic and where you place weatherstripping and sealants.
The choice of acrylic thickness affects both insulation performance and mechanical behavior. For small to medium-sized windows, 3 millimeter (approximately 1/8 inch) thick acrylic is often sufficient. For larger openings, high-wind areas, or situations where additional noise reduction is desired, 4.5 millimeter to 6 millimeter (approximately 3/16 to 1/4 inch) sheets are commonly used. Thicker panels resist bowing and provide a more solid feel when installed as interior storm windows.
As a specialist acrylic sheet supplier, it is common to recommend thickness based on panel dimensions, frame design, and expected handling. Panels that will be frequently removed and reinstalled may benefit from slightly thicker material to withstand repeated use. On the other hand, permanently fixed interior glazing can sometimes use thinner panels if the frame provides adequate support and the span is modest.
Thorough preparation of the frame is one of the most important steps for reliable insulation. Remove dust, old tape, loose paint, and deteriorated sealants from the frame and surrounding surfaces. Use an appropriate cleaner or mild detergent to degrease the contact areas, then allow everything to dry fully. Any remaining debris or grease can prevent foam tape or sealant from adhering properly.
If the frame has cracks or gaps that extend into the surrounding wall, fill them with a compatible filler or sealant before continuing. The aim is to create a continuous, stable substrate for the weatherstripping and plexiglass panel. Investing time at this stage reduces the likelihood of air leaks and premature failure of the insulation measures.
Foam weatherstripping is used to close small gaps and create a compressible seal around the window opening. Cut strips of self-adhesive foam tape to match the length of each side of the frame. Remove the backing and press the foam firmly in place along the perimeter where the acrylic panel or sub-frame will contact the existing structure. Pay special attention to corners, ensuring continuous coverage.
After the first layer is installed, inspect for remaining gaps or irregularities. If necessary, add a second layer to improve the seal, especially in areas with uneven surfaces. The foam not only reduces air leakage but also cushions the acrylic panel, reducing vibration, noise, and potential rattling during wind or normal use.
Many plexiglass insulation systems use a dedicated sub-frame or magnetic frame to support the acrylic panel. If you are using such a system, position the frame within the window opening and maintain a minimum clearance from the outer edges to avoid splitting or damaging the underlying structure with screws. Mark consistent distances around the perimeter so that the frame sits square and centered.
Fix the frame with suitable screws, tightening them gradually and evenly. Avoid overtightening, which could distort the frame or create stress on the acrylic panel. For magnetic systems, adhesive-backed magnetic strips are applied both to the sub-frame and to the edge of the acrylic panel so that the panel can be removed for cleaning or seasonal changes.
Before sealing anything permanently, place the acrylic sheet into the frame to confirm the fit. The panel should sit snugly against the foam or magnetic strips without excessive force. Check all sides for even contact, and ensure there are no obvious gaps or areas where the panel bows away from the frame. If the fit is too tight or too loose, adjust the panel size or weatherstripping as needed.
Dry-fitting allows you to verify that the dimensions and tolerances are correct before sealants or additional fasteners are applied. This step prevents unnecessary rework and reduces the risk of cracking the acrylic during final installation.
To achieve real insulation benefits, it is essential to create an airtight perimeter around the window assembly. Use a clear or color-matched sealant that is compatible with acrylic. Apply a continuous bead along the outer edge where the frame meets the surrounding wall or existing sash. Move steadily to avoid breaks, and tool the sealant gently to press it into gaps and create a smooth surface.
Allow the sealant to cure for the recommended time, often around twenty-four hours, before cleaning or applying significant pressure to the assembly. Choosing a sealant that bonds well to both acrylic and frame materials prevents future leaks and helps maintain long-term performance. It is important to avoid sealants that cause stress cracking or discoloration of acrylic; always check manufacturer guidance before use.
After installation and curing, remove any remaining protective films from the acrylic surfaces. Clean the panel with an approved acrylic cleaner or mild soap solution using a soft, lint-free cloth. Avoid abrasive sponges, harsh solvents, and ammonia-based products, as these can scratch or cloud the acrylic.
Using an anti-static cleaner or polish can help reduce dust attraction, making the window easier to keep clean over time. Gentle, regular maintenance preserves clarity and ensures that the insulated plexiglass window continues to deliver both visual and thermal benefits.
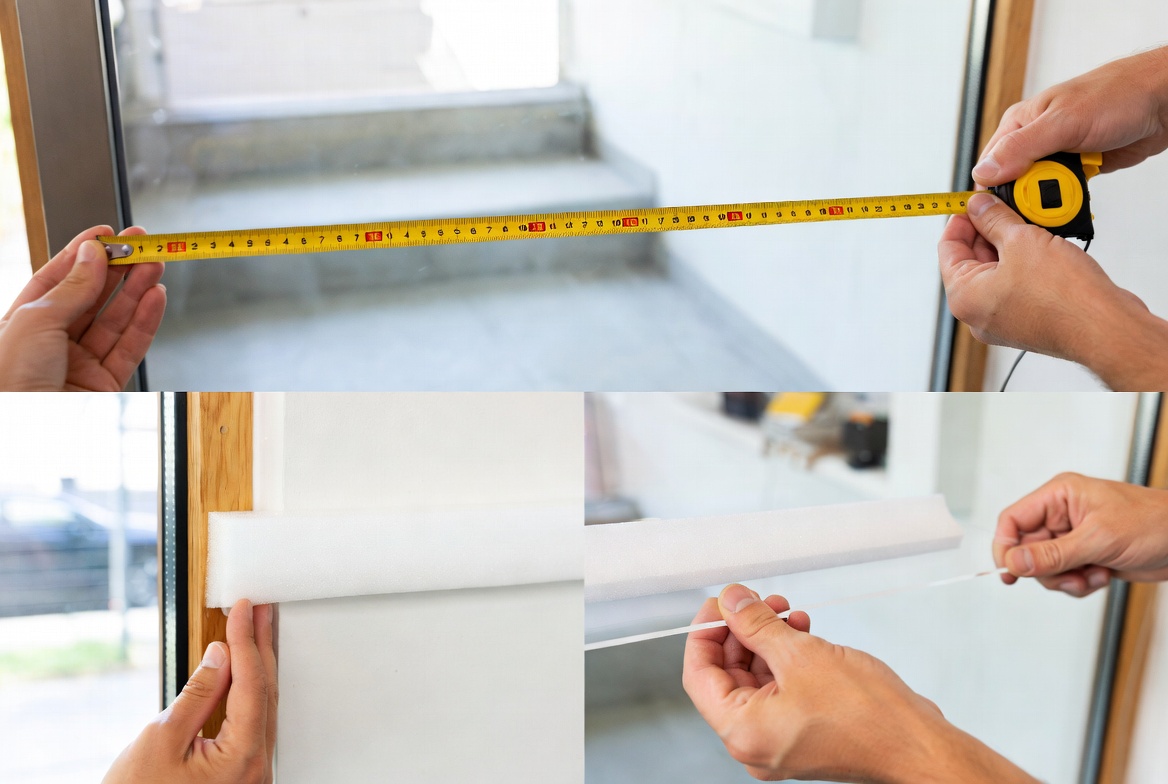
Not every project requires or allows a fully framed interior storm window system. Several simpler approaches can still provide meaningful draft reduction and comfort improvements, particularly when budgets or time are limited. Among these options are clear film kits, removable acrylic panels with foam compression, and hybrid arrangements that combine different techniques.
Clear plastic film kits use thin plastic stretched over the interior of the window frame and secured with tape, then tightened with warm air. While less robust than acrylic panels, they offer a very low-cost way to reduce drafts in older windows and are popular for seasonal upgrades. Removable acrylic panels with foam compression can be used where drilling into the frame is not desirable, providing a snug fit that can be released during warmer months.
Based on installation experience and user feedback, several recurring mistakes tend to limit the performance of plexiglass window insulation. Being aware of these issues in advance makes it easier to avoid them and obtain better long-term results. One frequent problem is leaving small gaps at the edges of the frame or panel. Even narrow openings can allow cold air and moisture to bypass the insulating layer, reducing effectiveness.
Another common mistake is using sealants or adhesives not suited to acrylic. Incompatible products may fail to bond correctly or cause stress-related cracks in the sheet. Neglecting to control indoor humidity can also lead to condensation, even when the acrylic is installed correctly. Regular ventilation, appropriate use of exhaust fans, and attention to moisture sources help keep condensation under control. Finally, improper cleaning with abrasive tools or strong chemicals can scratch or cloud acrylic, forcing early replacement.
From the perspective of an acrylic sheet manufacturer supplying projects worldwide, several themes stand out when evaluating successful plexiglass insulation projects. Matching panel thickness and size to the local climate and building exposure is one of the most important factors. In colder regions or high-wind locations, slightly thicker panels and robust frames contribute to both comfort and durability.
Selecting appropriate acrylic grades also matters. For sun-exposed facades, UV-stable acrylic formulations help maintain clarity and avoid yellowing over time. In urban or high-traffic environments, combining thicker acrylic panels with resilient weatherstripping and careful sealing can significantly reduce noise transmission while improving thermal comfort. When projects involve multiple buildings or large numbers of windows, standardizing panel dimensions and frame details simplifies manufacturing and installation, improving consistency and reducing cost.
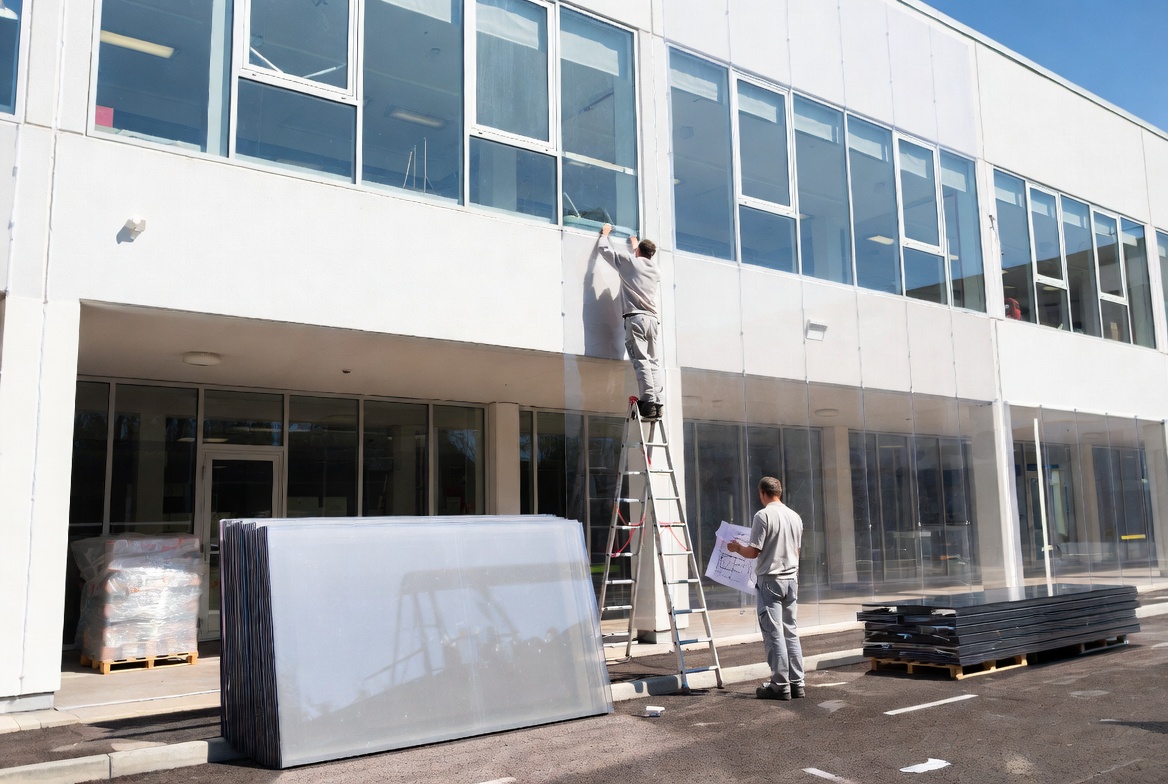
Plexiglass window insulation can bring meaningful value in a wide range of settings. In older homes with single-pane windows, adding interior acrylic panels is often much less disruptive than full window replacement and can be done in stages as budgets allow. Rooms that feel noticeably colder or draftier than others, such as north-facing living rooms or bedrooms over garages, tend to benefit quickly from added insulation.
Beyond residential applications, plexiglass inserts can enhance comfort in offices, schools, and light commercial buildings that rely on existing glazing. In greenhouses and skylights, acrylic panels can withstand temperature swings and mechanical stresses while supporting energy control strategies. Combining good installation practices with carefully selected acrylic materials creates durable, transparent barriers that support both comfort and efficiency objectives.
The following table summarizes typical materials and tools used in plexiglass window insulation projects. This checklist can be adapted for both small-scale DIY projects and larger-scale building programs.
| Item | Main Function |
|---|---|
| Acrylic sheet (3–6 mm) | Primary transparent panel for insulation and secondary glazing. |
| Foam weatherstripping | Seals gaps, provides compressible contact between panel and frame. |
| Magnetic strips (optional) | Allows removable interior panels for seasonal use. |
| Compatible sealant | Creates an airtight perimeter at the frame and wall junction. |
| Acrylic-safe cleaner | Maintains clarity without scratching or clouding. |
| Measuring tools and fasteners | Ensures accurate panel sizing and secure frame attachment. |
Insulating plexiglass windows combines practical materials, thoughtful design, and careful installation to create warmer, quieter, and more stable indoor environments. By understanding the properties of acrylic, selecting appropriate thicknesses, and following a structured installation process, both homeowners and project teams can upgrade existing windows without full replacement. Working with experienced acrylic sheet suppliers and paying attention to details such as air sealing, compatibility of sealants, and regular maintenance helps ensure that plexiglass window insulation delivers durable comfort and long-term energy savings.
Plexiglass (acrylic) can provide better insulation than ordinary glass when used in properly designed systems. Its lower thermal conductivity means that, for a given thickness, less heat passes through the material. When acrylic is added as a secondary interior panel with a sealed air gap, it can significantly improve the overall thermal performance of an existing glass window.
For most residential interior storm windows and secondary glazing, 3 millimeter acrylic is suitable for smaller openings, while 4.5 to 6 millimeter panels are recommended for larger spans and more demanding conditions. Thicker panels are also beneficial when a reduction in outside noise is desired. Selecting the right thickness depends on window size, wind exposure, and how the panel will be handled.
Insulated plexiglass windows can reduce condensation by keeping inner surfaces warmer and limiting the movement of moist air onto cold surfaces. However, condensation also depends on indoor humidity levels and ventilation. If humidity remains high and ventilation is poor, some condensation may still occur, especially at edges or within gaps. Managing moisture sources and ensuring adequate airflow work together with window insulation to control condensation.
Yes, many renters use removable acrylic panels and magnetic secondary glazing systems because they require little or no modification to the existing frame. Magnetic strips or foam compression fit panels can often be installed and removed without leaving permanent marks. As always, it is important to check rental agreements and local regulations before making any changes to the property.
The exact savings depend on factors such as climate, baseline window condition, and how many openings are upgraded. In buildings with significant drafts and single-pane windows, adding insulated plexiglass panels can reduce heating energy use by a noticeable margin. Many users report that rooms feel warmer, drafts are reduced, and heating systems cycle less frequently after installation, which over time contributes to lower energy costs.
Acme Plastics – “How to Insulate Plexiglass Windows to Keep Energy Bills Down”. https://www.acmeplastics.com/content/how-to-insulate-plexiglass-windows-to-keep-energy-bills-down/
Gokai – “How to Insulate Plexiglass Windows (Acrylic Windows) to Cut Energy Bills”. https://www.gokai.com.cn/
Feilong Acrylic – “Plexiglass Window Insulation Made Easy”. https://flacrylic.com/insulate-plexiglass-windows/
Fab Glass and Mirror – “Plexiglass Window Insulation Guide”. https://www.fabglassandmirror.com/blog/plexiglass-window-insulation-guide/
Acrylic sheet technical data – Optix Acrylic (Extruded Acrylic Sheet), Plastics International. https://www.plasticsintl.com/media/0d1hdzdu/acrylic-pmma-extruded-data-sheet.pdf
“How to reduce heat loss with Color Acrylic Sheet?” https://www.acrylicleasinder.com/news/how-to-reduce-heat-loss-with-color-acrylic-sheet.html