Shanghai Gokai Industry Co,.Ltd.
Call Us: +86-18918606548
Call Us: +86-18918606548
- Product Name
- Product Keyword
- Product Model
- Product Summary
- Product Description
- Multi Field Search
Views: 222 Author: Gokai Publish Time: 2026-04-13 Origin: Site


Creating your own acrylic photo frame is one of the simplest ways to give photos, posters, and artwork a clean, modern look—without paying gallery prices. As a supplier of acrylic sheet products serving OEM customers worldwide, I've helped hundreds of clients choose the right sheet thickness, finishes, and hardware to get professional results at home or in the workshop. [acmeplastics]
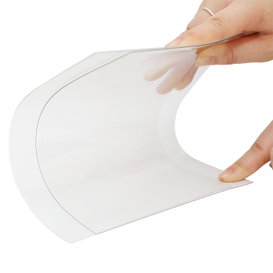
An acrylic photo frame is a minimalist "floating" frame made with two clear acrylic sheets that sandwich your photo or print, usually held together with standoff hardware or bolts at the corners. Compared with traditional glass frames, acrylic sheet is lighter, stronger, and much more impact‑resistant, which makes it ideal for busy homes, offices, and commercial spaces. [instructables]
From a supplier's perspective, acrylic frames are popular because they offer:
- Modern, frameless aesthetics that put all the focus on the image. [abeautifulmess]
- High clarity and brightness that enhances colors and contrast. [acmeplastics]
- Customization flexibility in size, thickness, edge finish, and mounting style. [acmeplastics]
- Better safety than glass in schools, retail, and public spaces. [acmeplastics]

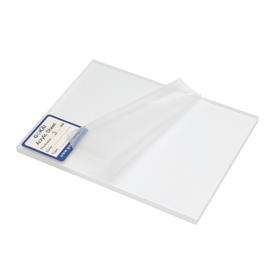
Before you start drilling or hanging anything, you need to select the right acrylic sheet. The quality of this choice determines how clear, flat, and long‑lasting your finished frame will be. [acmeplastics]
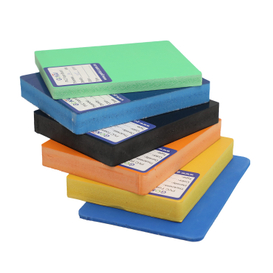
Most DIY frame projects use extruded acrylic because it is cost‑effective, offers good clarity, and is easy to cut to size. Extruded sheets are transparent, moisture‑resistant, about half the weight of glass, and many times stronger. [acmeplastics]
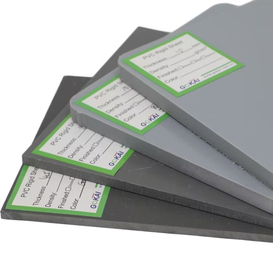
For higher‑end installations or museum‑style displays, you may consider cast acrylic or specialty grades:
- UV‑resistant acrylic (e.g., OP3) to protect artwork from fading. [acmeplastics]
- Non‑glare (P99‑type) surface to reduce reflections under strong lighting. [acmeplastics]
As a supplier, we typically recommend standard extruded clear acrylic for most home and office DIY frames, and UV‑resistant grades for galleries, retail, or sun‑exposed spaces. [acmeplastics]
For typical photo sizes:
- Up to 8" × 10": 2–3 mm (about 1/8") thick acrylic works well. [instructables]
- 11" × 14" and 16" × 20": 3–4.5 mm to keep panels stiff and flat. [youtube]
- Large posters (24" × 36" and above): 4.5–6 mm to avoid visible bowing. [myhomierhome]
Ensure the photo and cut‑to‑size acrylic share matching dimensions or that the acrylic is slightly larger to create a floating border around the image.

From years of customer projects, this is the most reliable checklist for a clean result on the first try. [myhomierhome]
Materials
- 2 pieces of clear acrylic sheet, cut to the same size
- Your photo, print, or artwork (high‑resolution, professionally printed for best results)
- Painter's tape
- Glue dots or double‑sided adhesive for photos [myhomierhome]
- Corner standoffs or bolts and nuts (4 sets, one for each corner) [instructables]
- Optional: paint for hardware to match your décor
Tools
- Drill or pillar drill (a drill press is easier for beginners) [instructables]
- Suitable drill bits for acrylic and hardware size [abeautifulmess]
- Scrap wood backing board for drilling support [abeautifulmess]
- Measuring tape or ruler and a pencil/marker
- Microfiber cloths
- Mild soap and water
- Optional: blow dryer to remove dust without scratching
The starting point for a professional‑looking frame is a high‑quality image.
1. Select a photo or artwork with sufficient resolution for the desired print size.
2. Order a high‑resolution print from a professional printer for accurate color and detail.
3. Decide whether you want full‑bleed (acrylic same size as the print) or a floating look (acrylic slightly larger than the image). [abeautifulmess]
As an acrylic supplier, we often see customers underestimate how much print quality impacts the final result—even the clearest acrylic will not save a low‑resolution or poorly printed image. [myhomierhome]
Proper preparation is critical to avoiding scratches and misaligned holes. [instructables]
1. Keep the protective film on both sides of the acrylic as long as possible. If your sheet has no film, cover both faces with painter's tape, especially near the corners, to prevent scratching. [abeautifulmess]
2. Decide where the corner hardware will go; typically, holes are placed around 10 mm from each edge in each corner for small to medium frames. [instructables]
3. Using a ruler, mark the hole positions on the painter's tape or protective film. Double‑check measurements so all four corners match. [instructables]
4. Stack the two acrylic sheets together and clamp them if possible so you can drill both at once, ensuring perfect alignment. [instructables]
From an OEM perspective, we routinely pre‑drill or CNC‑machine these holes for customers who want production‑level consistency across multiple frames. [acrylite]
Drilling is the step that worries most DIYers, but with the right technique, cracks are highly avoidable. [abeautifulmess]
1. Place a scrap wood board under the acrylic to support it fully while drilling. [abeautifulmess]
2. Start with a small pilot drill bit and position it exactly on your mark. [abeautifulmess]
3. Drill gently to start the hole, then—following a widely used pro technique—switch the drill into reverse and continue drilling to effectively melt through the sheet instead of aggressively cutting it. [abeautifulmess]
4. Gradually step up to larger bits until the hole matches your hardware diameter. [abeautifulmess]
5. Once all four holes are drilled through both sheets, remove dust and check that the hardware fits smoothly. [instructables]
As a manufacturer, we always stress two points: use sharp bits and don't rush—heat and stress are the main enemies when machining acrylic. [abeautifulmess]

After drilling, cleaning makes the difference between a professional look and a cloudy, dusty frame.
- Wipe both acrylic pieces with a non‑abrasive microfiber cloth.
- Use mild soap and lukewarm water if needed, then dry with a clean cloth.
- To remove fine particles from machining, you can gently blow them off with a blow dryer at a cool setting to avoid rubbing particles across the surface.
Avoid glass cleaners containing ammonia, harsh chemicals, or rough paper towels, which can cause micro‑scratches or crazing over time. [acmeplastics]
Now comes the most satisfying part: assembling the frame. [myhomierhome]
1. Remove the remaining protective films from the inside faces of the acrylic.
2. Lay one acrylic sheet flat with the inside face up.
3. Position your photo or artwork in the center (or according to your chosen layout).
4. Use glue dots or photo‑safe double‑sided tape on the back of the image to keep it in place. [myhomierhome]
5. Carefully place the second acrylic sheet on top, aligning the drilled holes in all four corners.
For most customers, we recommend clear, removable glue dots because they hold the image securely while allowing easy repositioning or replacement later. [abeautifulmess]

Hanging is often the trickiest step, but precise measurements will save you from re‑drilling wall holes.
1. With the assembled frame in hand, lightly mark the positions of all four corner holes on the wall. [myhomierhome]
2. Use a level to ensure your marks are perfectly horizontal and vertical.
3. Pre‑drill the wall at each mark according to your hardware manufacturer's instructions.
4. Install the "tube" or base part of the standoff or mounting hardware into the wall.
5. Align the acrylic frame's holes with the hardware and screw or bolt the front pieces into place to clamp the acrylic securely.
You can paint the mounting hardware to match your wall color or décor for a more seamless look, a tip many design‑conscious users appreciate.

If you are planning a full gallery wall, a commercial interior, or a branded project, you can go beyond basic clear acrylic. [acmeplastics]
Common upgrades we supply for OEM and trade customers include:
- UV‑blocking acrylic to protect fine art, photographs, and certificates. [acmeplastics]
- Non‑glare surface finishes for environments with strong overhead lighting or large windows. [acmeplastics]
- Laser‑polished edges for a crystal‑clear, premium appearance. [acrylite]
- Custom‑cut shapes (rounded corners, special ratios, logo cut‑outs) for brand‑specific designs. [acrylite]
For large rollouts—such as hotel rooms, office chains, and retail stores—our team can pre‑cut, drill, and kit all frame components, so contractors only need to mount and insert the printed artwork on‑site. [acrylite]
Based on feedback from both DIYers and professional buyers, these are the most common issues we see—and how to avoid them. [myhomierhome]
- Misaligned holes: Always measure twice and drill both acrylic sheets together to keep holes perfectly matched. [instructables]
- Cracked corners: Use painter's tape, support the sheet with wood beneath, and drill slowly, switching to reverse when drilling through acrylic. [abeautifulmess]
- Visible scratches: Keep the protective film on as long as possible and avoid abrasive cloths or cleaners. [acmeplastics]
- Cloudy or streaky surfaces: Rinse with mild soap and water, then dry with a clean microfiber cloth to maintain clarity.
- Warping on large frames: Choose thicker acrylic (4.5–6 mm) for big formats to keep panels flat over time. [myhomierhome]
By treating acrylic as a precision material—rather than "just plastic"—you can achieve a very high‑end finish even on your first project. [acmeplastics]
For a single frame, a DIY approach is perfect. But when you need dozens or hundreds of consistent, branded acrylic frames, partnering with a specialized acrylic sheet supplier and OEM manufacturer is more efficient. [acmeplastics]
An experienced OEM partner can:
- Provide cut‑to‑size acrylic sheets in bulk, ready to assemble. [acmeplastics]
- Pre‑drill mounting holes and finish edges for repeatable quality. [acrylite]
- Recommend the best sheet thickness and grade for your application and environment. [acmeplastics]
- Integrate your design specs into mass production for hotels, retail displays, or promotional campaigns. [acrylite]
If you are planning a large project or require consistent quality across multiple locations, reach out with your drawings, target quantities, and performance requirements, and we can propose a tailored acrylic solution. [acrylite]
If you are ready to build a durable, modern acrylic photo frame, start with high‑quality cut‑to‑size acrylic sheets designed for framing applications. Share your desired size, thickness, and quantity, and our team can recommend the ideal acrylic type, pre‑cut solution, and OEM options to match your budget and installation needs. [acmeplastics]
Whether you are a DIY creator decorating one wall or a business planning a large‑scale roll‑out, partnering with an acrylic sheet specialist will help you get cleaner edges, safer installations, and a more professional finish. [acmeplastics]
1. Is acrylic better than glass for picture frames?
Acrylic is lighter, more impact‑resistant, and less likely to shatter than glass, which makes it safer and easier to handle, especially for large frames and public spaces. Glass can be more scratch‑resistant, but modern acrylic grades offer excellent clarity and durability when cleaned properly. [acmeplastics]
2. How thick should acrylic be for a floating frame?
For small frames up to 8" × 10", 2–3 mm is usually sufficient, while mid‑size frames benefit from 3–4.5 mm and larger posters from 4.5–6 mm to avoid flexing. Thicker acrylic also gives a more substantial, premium feel to the finished frame. [myhomierhome]
3. How do I clean acrylic without scratching it?
Use a soft microfiber cloth with mild soap and water, then gently dry with a clean cloth. Avoid ammonia‑based glass cleaners, harsh chemicals, and rough paper towels, as they can cause fine scratches and long‑term clouding. [acmeplastics]
4. Can I drill acrylic with a normal household drill?
Yes, you can use a standard drill, but you should support the sheet with scrap wood, start with a small pilot hole, and often drill in reverse to reduce cracking. Always drill slowly and let the bit cool if it becomes hot to prevent stress in the material. [instructables]
5. Do I need UV‑resistant acrylic for my photos?
For everyday home or office photos away from direct sunlight, standard clear acrylic is usually enough. For valuable artwork, archival prints, or bright sun‑exposed walls, UV‑resistant acrylic helps reduce fading and is worth the small extra investment. [acmeplastics]
- Acme Plastics – "How to Make a Photo Frame with Cut‑To‑Size Acrylic"
<https://www.acmeplastics.com/content/how-to-make-a-photo-frame-with-cut-to-size-acrylic/>
- Acme Plastics – "The Best Materials for Plastic Picture Frames"
<https://www.acmeplastics.com/content/the-best-materials-for-plastic-picture-frames/> [acmeplastics]
- Acme Plastics – Acrylic Photo Frames content archive
<https://www.acmeplastics.com/content/tag/acrylic-photo-frames/> [acmeplastics]
- A Beautiful Mess – "Floating Acrylic Frame DIY"
<https://abeautifulmess.com/floating-acrylic-frame-diy/> [abeautifulmess]
- Instructables – "Simple Sandwich Acrylic Photo Frame"
<https://www.instructables.com/Simple-Sandwich-Acrylic-Photo-Frame/> [instructables]
- My Homier Home – "DIY Acrylic Frames | How to Make & Hang Your 3D Art"
<https://myhomierhome.com/diy-acrylic-frames/> [myhomierhome]
- ACRYLITE – "DIY Floating Picture Frame Tutorial"
<https://www.acrylite.co/applications/framing-and-picture-glazing/diy-floating-picture-frame-tutorial-by-acrylite> [acrylite]