Shanghai Gokai Industry Co,.Ltd.
Call Us: +86-18918606548
Call Us: +86-18918606548
- Product Name
- Product Keyword
- Product Model
- Product Summary
- Product Description
- Multi Field Search
Views: 222 Author: Loretta Publish Time: 2026-02-12 Origin: Site


Content Menu
● What Makes Gluing Acrylic to Plastic Different?
● Can You Use Super Glue on Acrylic Plastic?
● Solvent‑Based Acrylic Cements: The Clear Bonding Standard
● Other Adhesive Options for Acrylic‑to‑Plastic Bonding
● Safety First: Ventilation and Protective Gear
● Step‑by‑Step: How to Glue Acrylic Plastic to Acrylic Plastic
>> Step 1: Set Up a Suitable Workspace
>> Step 2: Inspect and Prepare Acrylic Edges
>> Step 3: Clean and Dry the Acrylic
>> Step 4: Dry‑Fit and Clamp the Parts
>> Step 5: Transfer Solvent Cement to a Needle‑Tip Applicator
>> Step 6: Apply the Glue Using Capillary Action
>> Step 7: Initial Set and Full Cure
● Practical Examples: Typical Acrylic Bonding Applications
● Advanced Tips for Seamless, Bubble‑Free Joints
● Common Mistakes to Avoid When Gluing Acrylic to Plastic
● When to Choose Professional Fabrication or OEM Support
● Take the Next Step for Your Acrylic and Plastic Projects
● FAQs About Gluing Acrylic Plastic to Plastic
>> 1. How long does acrylic solvent cement take to fully cure?
>> 2. Can I glue acrylic to PVC or ABS plastic?
>> 3. Why did my acrylic joint turn cloudy or white?
>> 4. Do I need to sand the edges before gluing?
>> 5. Is gluing acrylic safe to do at home?
Gluing acrylic plastic to plastic is not the same as using ordinary craft glue; it relies on solvent‑based acrylic cements that chemically fuse the surfaces for a clear, long‑lasting bond. This guide explains the best adhesives, preparation steps, and application techniques so DIY users, professionals, and OEM buyers can achieve clean, bubble‑free joints on both small projects and large acrylic assemblies.

Acrylic (PMMA) is a thermoplastic that does not bond reliably with typical white glue or many general‑purpose construction adhesives because they cannot dissolve and fuse the surface. Instead, professional fabricators use solvent cements that soften the acrylic at the joint and then evaporate, leaving behind a single, joined piece with near‑invisible seams.
- The bond is created by chemical welding, not just surface sticking.
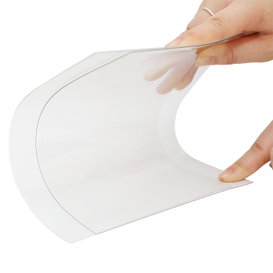
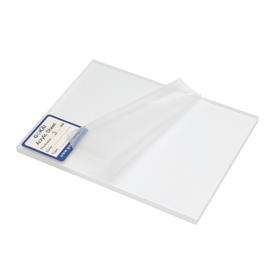
- Clear acrylic requires clear‑drying, non‑bubbling adhesive to maintain optical appearance.
- Joint quality depends heavily on edge preparation, clamping, and curing time.
For OEM projects or repeated production runs, choosing the right bonding method up front can reduce rework, cracking, and warranty issues for acrylic products.
Many beginners reach for cyanoacrylate (super glue), but it is usually not the best solution for clear acrylic sheets.
- Super glue can bond small, non‑transparent, or temporary parts but often turns white or cloudy as it cures.
- It is more prone to stress cracking on acrylic, especially on edges under load.
- Excess glue is difficult to remove cleanly once cured.
If your project involves transparent displays, aquariums, light boxes, or clear covers, solvent‑based acrylic cements are the preferred choice.
Solvent‑based acrylic cements are designed specifically for gluing acrylic to acrylic or compatible plastics.
Key characteristics of solvent cements
- Chemically soften the acrylic surface and fuse parts into a single structure.
- Dry clear when used correctly, ideal for transparent panels and edges.
- Work best with close‑fitting joints and smooth, square edges.
For typical acrylic sheet projects, thin solvent cements are applied via a needle‑tip bottle and drawn into the joint by capillary action, forming a crisp, straight seam.
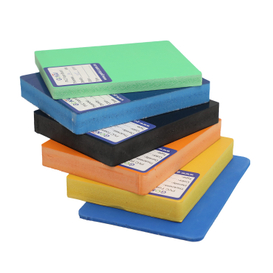
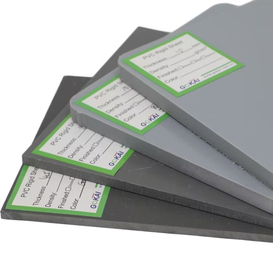
In some cases, you may need to bond acrylic to non‑acrylic plastics (ABS, PVC, polycarbonate) or where gaps need filling.
| Adhesive type | Best use case | Advantages | Limitations |
|---|---|---|---|
| Solvent acrylic cement | Acrylic to acrylic, tight joints | Very strong, clear, professional edges | Requires good fit, careful handling |
| 2‑part epoxy | Acrylic to dissimilar plastics or metals | Gap filling, high strength | Usually visible, may yellow over time |
| Cyanoacrylate (super glue) | Small fixtures, opaque parts | Fast, convenient for small areas | Can turn white, brittle, stress cracking |
| Double‑sided acrylic tape | Signage, displays, vibration‑sensitive parts | Clean, no curing time, removable in some cases | Lower structural strength, heat limits |
For structural assemblies, enclosures, or clear display boxes, solvent cements remain the primary recommendation.
Solvent‑based acrylic glues release strong fumes and must be handled with proper safety measures.
- Work in a well‑ventilated area or under local exhaust ventilation.
- Wear chemical‑resistant gloves, safety goggles, and an appropriate mask when working for extended periods.
- Keep adhesives away from open flames or ignition sources, as many are flammable.
Following the manufacturer’s safety data sheet (SDS) for each adhesive is essential for both home users and industrial workshops.
The following procedure is widely used in sign‑making shops, display manufacturers, and acrylic fabricators to achieve clean, strong joints.
Choose a stable, non‑plastic work surface such as wood, metal, or concrete so the solvent glue does not accidentally bond your workpiece to the table.
- Ensure good lighting to see edges and bubbles clearly.
- Lay down kraft paper or a sacrificial board to catch small spills.
Avoid gluing on plastic, paper, or glass surfaces that can be damaged or accidentally fused by the solvent.
Imperfections like chips, saw marks, or deep scratches weaken the joint and trap air.
- Check all bonding edges for bumps, chips, or cuts; re‑machine if necessary.
- Use a router, jointer, or fine‑grit sanding block to obtain flat, square edges, but avoid over‑rounding them.
- For best results, start from a clean saw‑cut finish and then lightly polish or scrape the edges.
Well‑fitting edges allow the solvent to wick uniformly, forming a straight, bubble‑free seam.
Dust, fingerprints, and oils can interfere with chemical bonding.
- Remove protective film only from the areas to be bonded to limit scratching.
- Clean with lukewarm water and mild soap, or a dedicated acrylic cleaner.
- Dry with a soft, lint‑free cloth and avoid paper towels that can scratch the surface.
Make sure both the surfaces and the surrounding area are completely dry before gluing.
Before applying any glue, position the acrylic parts exactly as they will be bonded.
- Use corner jigs, wooden blocks, and clamps to hold panels at the correct angle.
- Check that all edges are fully touching without gaps along the joint.
- For large assemblies, plan a sequence so you can reach each seam comfortably.
Once everything is aligned, keep the parts clamped firmly in place; they should not move during adhesive application or curing.

Thin solvent cements are easiest to control in a small bottle with a fine needle tip.
- Fill the applicator bottle to about 75% capacity to prevent spills when squeezing out air.
- Expel excess air from the bottle before inverting to reduce bubbles in the glue stream.
This setup lets you trace long joints in one smooth motion, which is crucial for clean edges.
With the parts clamped together, place the needle tip at one end of the joint and gently squeeze.
- Allow the thin solvent to wick into the joint by capillary action, moving the tip steadily along the seam.
- Avoid starting and stopping repeatedly, which can create thick spots or streaks.
- Use only enough adhesive to wet the entire joint; flooding can cause whitening or drips.
If a small pool or drip appears, do not wipe it while wet; let it evaporate, then polish or clean the area afterward to avoid permanent blemishes.
After application, the parts must remain perfectly still during the initial set.
- Maintain clamp pressure or manual support for about 15–30 minutes until a light bond has formed.
- During this time, the joint may look cloudy, gradually clearing as solvent evaporates.
- Do not load, flex, or transport the assembly until at least 24–48 hours of curing, depending on adhesive and thickness.
Full strength often requires up to 48 hours, especially for thick sections or critical structural components.
Professionals and OEMs use these techniques in a wide variety of applications.
- Retail and trade‑show displays such as product stands and brochure holders.
- Light boxes, LED signage, and illuminated letters.
- Machine guards, protective covers, and inspection windows.
- Aquarium or terrarium components, clear enclosures, and technical housings.
In each case, solvent‑based acrylic cements allow precise, aesthetic joints with good long‑term durability when properly designed and cured.
Small changes in technique can significantly improve final appearance, especially on clear edges.
- Control temperature and humidity around the workspace to promote even curing.
- Pre‑scrape edges with a sharp scraper to remove machining marks before light sanding.
- Use clamps that do not bite into the acrylic; add soft pads to prevent indentations.
- Keep applications thin; thick layers trap air and may cause whitening or weak bonds.
For precision work, practice first on offcuts to fine‑tune glue speed and hand movement before tackling visible project pieces.
Avoiding a few frequent errors can save time and material.
- Using general‑purpose glues instead of dedicated acrylic or compatible plastic adhesives.
- Gluing on plastic or paper tabletops where overspill bonds the workpiece to the surface.
- Over‑sanding or rounding edges so they no longer meet cleanly.
- Moving or flexing the joint before the adhesive has fully cured.
- Wiping wet spills, which smears softened acrylic and leaves permanent marks.
Recognizing these issues helps both hobbyists and professionals achieve more consistent results from project to project.
For high‑value projects such as retail fixtures, machine guards, or branded acrylic housings, outsourcing bonding to experienced manufacturers can improve both reliability and aesthetics.
- Professional shops use jigs, CNC‑machined edges, and controlled environments for repeatable quality.
- OEM‑capable suppliers can combine cutting, bonding, polishing, and printing in one process chain.
If you require custom‑cut acrylic sheets, precision bonding, or integrated fabrication services together with PVC foam board and other plastics, partnering with a specialized manufacturer with global OEM experience ensures consistent quality from prototype to mass production.
If you are planning a new acrylic display, enclosure, sign, or industrial cover, now is the time to choose the right adhesive, refine your bonding process, and secure a reliable source of high‑quality acrylic sheets and compatible plastics. Review your project dimensions, quantities, and performance requirements, then contact a professional acrylic and PVC foam board manufacturer with OEM capabilities to discuss material selection, bonding options, and production support tailored to your needs.
Contact us to get more information!

Most thin acrylic solvent cements create a light handling bond in about 15–30 minutes, but they typically require 24–48 hours to reach full mechanical strength, especially on thicker sections.
Yes, but you will often need a compatible multi‑purpose solvent adhesive or a 2‑part epoxy designed for dissimilar plastics, as pure acrylic cements are optimized for acrylic‑to‑acrylic joints.
Cloudiness can result from excess adhesive, trapped moisture, or microscopic cracking caused by stress or incompatible glues such as some cyanoacrylates on clear acrylic.
Light sanding or scraping helps remove saw marks and improves contact, but edges should remain square and flat; rounding them too much can lead to gaps and weaker bonds.
Yes, as long as you work in a well‑ventilated area, follow the adhesive’s safety instructions, avoid open flames, and wear basic protective gear like gloves and goggles when handling solvent cements.
1. https://www.acmeplastics.com/content/a-guide-to-gluing-acrylic-plastic-to-plastic/
2. https://www.acmeplastics.com/how-to-plastic-tips
3. https://razorlab.online/acrylic-bonding-the-complete-guide/
4. https://turboplastic.com/blog/how-to-glue-acrylic-sheet/
5. https://uvacrylic.com/blog/how-to-bond-acrylic/
6. https://www.cutmy.co.uk/ideas-advice/how-to-glue-acrylic/
7. https://www.tapplastics.com/product_info/videos/play/how_to_glue_acrylic
8. https://www.tapplastics.com/image/pdf/Product_Bulletin_2.pdf
9. https://www.daniellewethington.com/gluingacrylic/ https://www.acplasticsinc.com/informationcenter/r/gluing-acrylic-sheeting